[ View Demo]
Leads >> My Active Leads
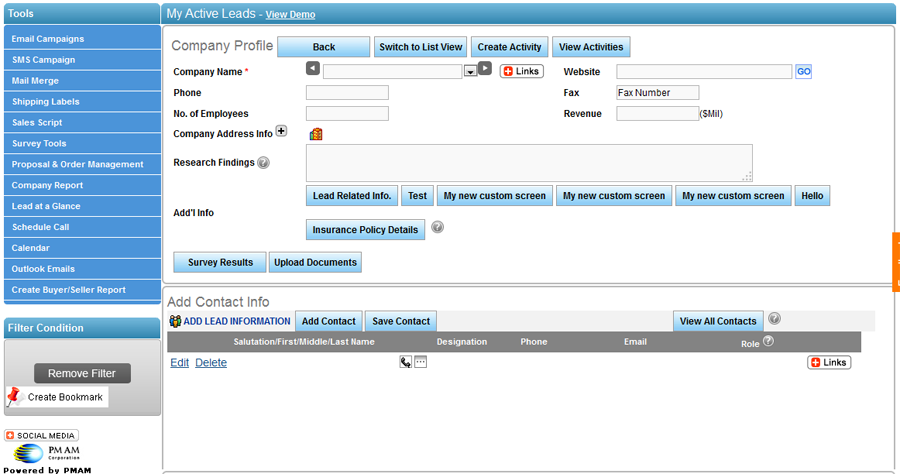
The My Active Leads is the lead owner’s home page for retrieving and managing lead related information. This page has been divided in following sections that include:
1. Company Profile
2. Contact Information.
3. Notes.
4. Sales Forecast.
5. Lead Organizer.
1. Company Profile:
This section presents the company’s contact information that includes Company Name, Website, Address, and other details to the lead owner. It permits the user to (1) alter and look up the company information on the internet by using various search links in the section and, (2) save additional lead information from the internet or from a reliable source in the Research Findings field. The Company Info option is dedicated to add, view, or modify number of employees, revenue, and company’s SIC details.
Furthermore, a lead owner with administrator rights can add or modify the existing custom fields in the section. This feature is used to mention various services offered by the company.
1. From the Company
Name drop-down box, select the company.
2. Click ![]() to look up the company information using Google search.
to look up the company information using Google search.
3. Click ![]() to look up the company information using Yahoo search.
to look up the company information using Yahoo search.
4. Click ![]() to display the consolidated lead information.
to display the consolidated lead information.
5. Click ![]() to look up the company information in Wikipedia.
to look up the company information in Wikipedia.
6. In the Website field, enter the company’s website
and click on Go to launch the website URL in the default web browser.
7. In the Phone and Fax field, enter your company Phone
number and Fax number respectively.
8. Click on ![]() to enter your Company Address.
to enter your Company Address.
9. Click on ![]() to add your company’s branch details.
to add your company’s branch details.
Notes: In the Branch Details window, the lead manager can add or delete company branch details.
2. Contact Information:
Maintaining records of company’s contact personnel is an important task in any CRM application. The Contact Information section allows the lead owners to (1) add, modify, or delete name, designation, phone, email address, and personnel’s role, (2) research contact’s information in Wikipedia (W), (3) send emails, (4) assign custom defined roles to each contact and, (5) display the personnel’s name as a dial out number.
Additionally, a lead owner can save the contact’s additional information that includes (1) assistant’s mandatory details, (2) home and office address and contact numbers and, (3) social networking website details.
1. Click the Add
Contact button to add a new contact.
2. Click the Edit
to edit a contact details.
3. Click on the Save
button to save the contact changes.
4. Click on Delete
to delete a contact details.
5. Click the Email ID
of the contact personnel to display the PMAM
CRM CAMPAIGN window for composing and
sending an email.
6. Click ![]() icon
to view the contact’s dial out number.
icon
to view the contact’s dial out number.
7. Click ![]() icon
to display the More Information window.
icon
to display the More Information window.
3. Notes:
The section allows the lead owner to add, edit and view notes for the lead or a selected contact, schedule next call date, and other information. The system records and stores the added notes with the date and time stamp.
To add a note:
1. Click on Add Note button.
2. In the Notes text area, enter the desired notes.
3. In the important links are, enter the desired links.
4. From the Person you spoke to drop-down box, select the required contact.
5. If you wish to schedule a call, select Next Call Date.
6. Select start time and end time.
7. Enter a subject and click on save note to save your note.
4. Sales Forecast:
This section allows lead owner to add a sales proposal. This proposal can be later tracked through Sales Forecast Consolidated and Sales Forecast Detail report under report menu.
To add a Sales Proposal:
1. Select Sales Pipeline.
2. Select a Product.
3. Enter Opportunity size.
4. Enter Expected Closing Date.
5. Enter Probability.
6. Click on save button to save your Proposal.
5. Lead Organizer:
The Lead Organizer section enables the lead owner to (1) Select Lead Type, (2) Assign leads to a List, (3) Add a lead as favorites, (4) Change Lead to account, (5) Map Buyer, (6) and Map Seller.
To organize a lead:
1. Select lead type.
2. Select a list.
3. Select my favorites.
4. Click on save.
To change lead to account:
1. Check mark “Change Lead To Account”
2. Click on save button.
To Map Buyer:
1. Click on Map Buyer.
2. Select list(s).
3. Click on Map Buyer(s) button.
To Map Seller:
1. Click on Map Seller.
2. Select list(s).
3. Click on Map Seller(s) button.
Copyright 2000-2009 pmamcrm.com Web-based Customer Relationship Management (CRM)